This website is informational and cannot diagnose or treat illness or disease. Medical marijuana should be used under the direction of a licensed healthcare provider. This site contains advertisements. If you click a link and make a purchase, MarijuanaMommy.com may receive a commission.
Making your own medicine at home is easier than most patients realize. If you have access to cannabis flower or hemp, it’s easy to make a cannabis salve at home. Here’s a step-by-step guide showing how to make CBD Oil and CBD topicals at home from hemp flower.
What is a salve?
A salve is a semi-solid preparation usually containing herbal medicine that is used for healing or soothing. Salves are topicals, which means they are meant to be applied directly to the skin.
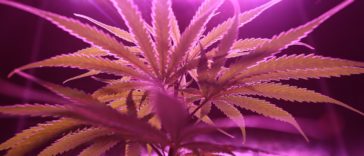
Salves are frequently made from herbs such as arnica, lavender, comfrey, and many other traditional herbal medicines. Cannabis salves a rapidly growing in popularity.
Research and anecdotal reports show CBD and THC may have significant therapeutic effects when applied topically. Cannabis salves are being used for a variety of purposes.
For this cannabis slave tutorial, you only need three ingredients: Oil, Beeswax, and Cannabis/Hemp Flower. If you prefer, you can also add other essential oils or herbs.
Why use a cannabis salve?
Many patients successfully use CBD oils or cannabis oils for topical application. However, because of the liquid nature of oil, a lot of the product can be wasted by dripping off or spreading beyond the area you’re trying to target.
Adding beeswax to convert the oil to a salve or ointment, gives the product a semi-solid texture. The beeswax increases the viscosity of the cannabis oil or CBD oil. The semi-solid nature of a cannabis salve means the product is much easier to apply topically. Topical cannabis salves are much more likely to stay where you place them compared to oil.
Making your own cannabis topicals is economical
Using a kit is very economical. The large kit sells for $75 and makes almost 15 oz. Nurse Grown also sells a premade hemp balm at $35 for 2 oz. To purchase 15 oz of pre-made CBD balm would cost more than $245.
How to make a cannabis salve
For this tutorial, I’m using a DIY Hemp Salve kit sold by Nurse Grown Organics, one of my favorite CBD companies (I love them so much, I’m an affiliate.)
The kit has almost everything you need to make up to 15 oz of your own DIY CBD topical at home. It includes 1 ounce of high-quality CBD hemp flower, 2 oz of beeswax, a muslin straining bag, and a large mason jar.
In addition to the kit, you’ll need, 2 cups of organic food-grade cooking oil. Choose an oil with a medium-to-high smoke point (coconut, olive, or grapeseed are great options).
I’m using the large DIY Hemp Salve Kit, but Nurse Grown also currently sells a smaller version.
If you don’t have a kit, don’t worry! You can absolutely gather the materials separately and still follow this same process. Here are all the materials I’m using to make my DIY cannabis salve.
Step-by-Step Guide to Making a Cannabis Salve
Materials Needed
1 oz cannabis flower (I’m using high-CBD hemp to make CBD oil)
2 oz beeswax
2 cups of organic food-grade oil (I’m using olive, you an use any with a medium to high smoke point)
Large mason jar
Smaller jars for salve storage (optional)
Essential oils (optional)
Cheesecloth or muslin bag for straining (you can use any straining method you choose)
Medium-sized pot, mixing utensils as needed
BUY the DIY Hemp Salve Kit from Nurse Grown Organics.
WARNING: In this process, we’re using the jar method. Some consumers have had jars break when cooking with them. Use caution. During the process, be sure that the jar avoids any contact with cold surfaces or cold liquids as that can increase the risk of the jar breaking. Of course, always use caution when handling hot oil or hot preparations.
Cannabis Salve Instructions
Step 1 – Decarboxylate Your Flower
Dried cannabis flower actually contains very little CBD and THC. Instead, raw cannabis flower is usually high in the acidic-form of those molecules, CBDA and THCA. In order to convert CBDA into CBD, you must decarboxylate your cannabis. We do this by heating it to the ideal temperature for the ideal amount of time.
I prefer to decarboxylate in my Ardent Nova which decarbs cannabis perfectly every time. If you do not have an Ardent, you can also decarb in a jar or in a covered dish inside your oven.
This is how I decarb perfectly every time.
You’ll want to break apart the larger buds of your cannabis flower, but you do not need to grind it.
To decarboxylate for CBD, place the broken up cannabis flower in the jar. Then bake the sealed jar at 250 degrees for 90 minutes. (Note, THC requires less time to decarb, about 35-45 minutes)

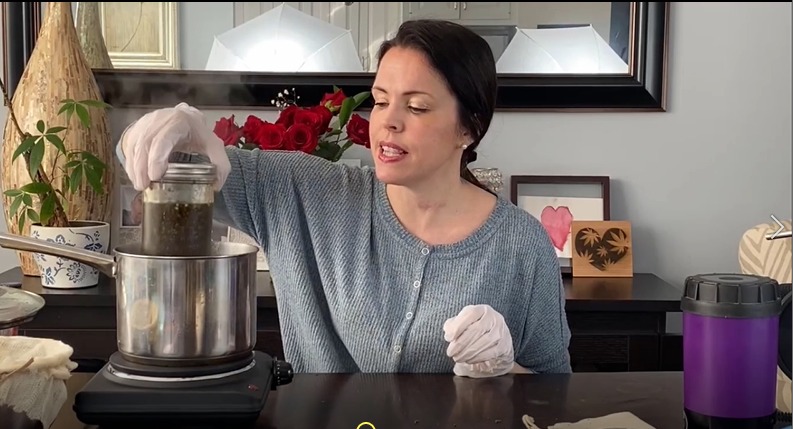
Step 2 – Infuse Your Oil – THE JAR METHOD
In this next step, you will make your CBD oil (or cannabis oil). To do this, you need to mix the oil and plant material together, and heat it. The heat will cause the cannabinoids (like CBD and THC) to move out of the plant material and into the oil around it.
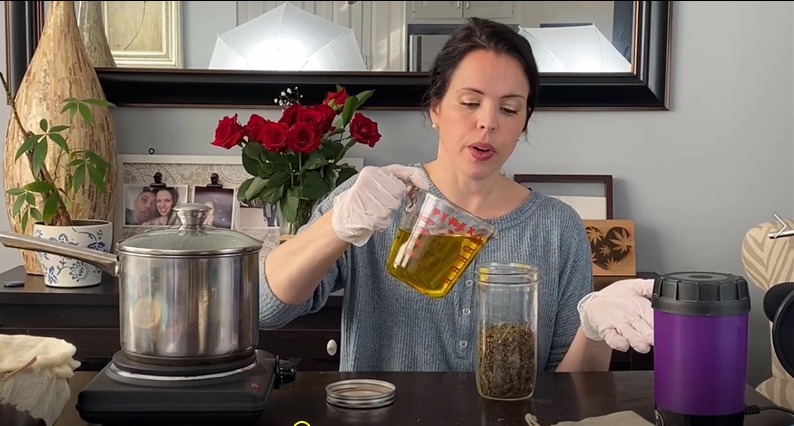
You can use any infusion method you’d like. Here we’re using the “Jar Method”.
Simply pour the oil into the jar that contains the already decarboxylated flower. Be sure the oil covers the plant material.
Place the sealed jar in a medium pot of boiling water. Simmer on low for 45-60 minutes. Shake the jar or stir the contents periodically during the infusion.
You just want to be sure there’s no way for the jar to tip and spill the contents into the water.
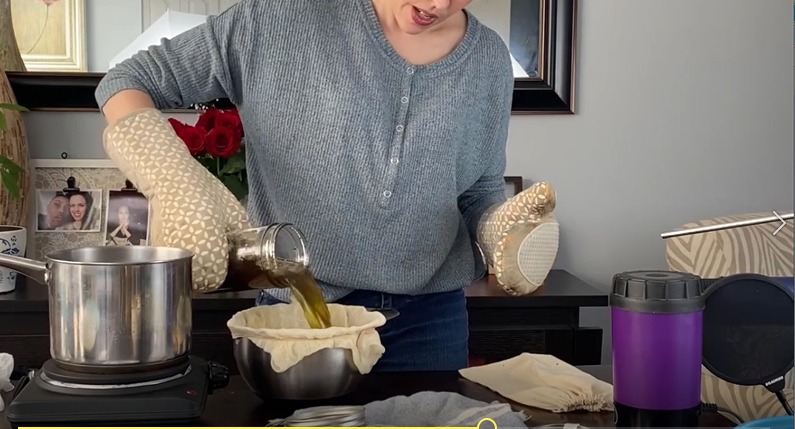
Step 3 – Strain Your Oil
You can use any straining method you like. The kit comes with a very convenient muslin bag. Cheesecloth is another great method.
As long as you used food-grade oil, this oil is edible. You can stop here and just use this as ordinary CBD oil. Take it with an oral syringe or add it to recipes.
If you’re making the topical, you’ll move on to the next step.
After you strain your oil, be sure to WASH YOUR JAR.
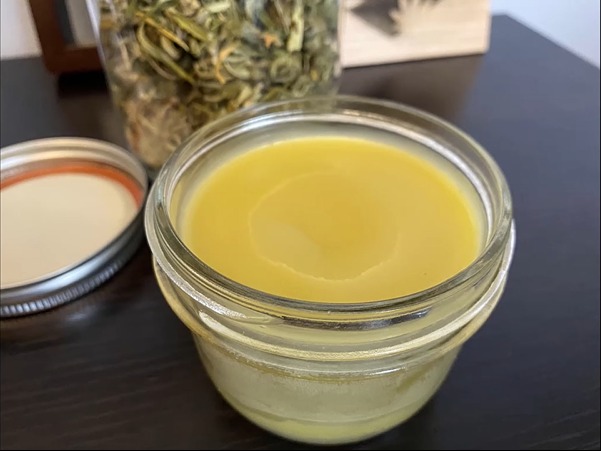
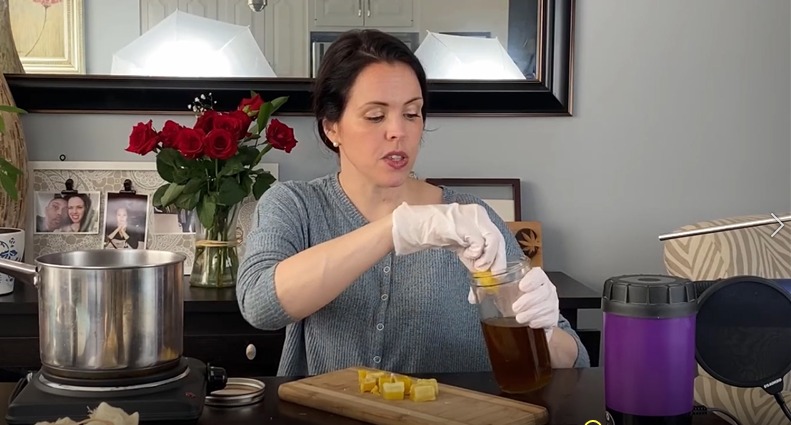
Step 4 – Incorporate the Beeswax
Next, you’ll add the infused oil back into your washed, clean jar. You’ll also add the beeswax.
Once again, place the sealed jar in a medium pot of boiling water. Simmer on low. Shake the jar or stir the contents periodically until all the beeswax is melted and incorporated into the oil
How long this takes, depends on how large your chunks of beeswax are. I chop mine and they take about 25-30 minutes to completely melt. You can also grate/shred your beeswax or use beeswax pellets to reduce the time needed to melt.
Step 5 – Add Essential Oils (OPTIONAL)
If you’re planning to add essential oils to your DIY hemp topical, this is the time to add them. Simply add the essential oils to the jar and give it a shake or a stir.
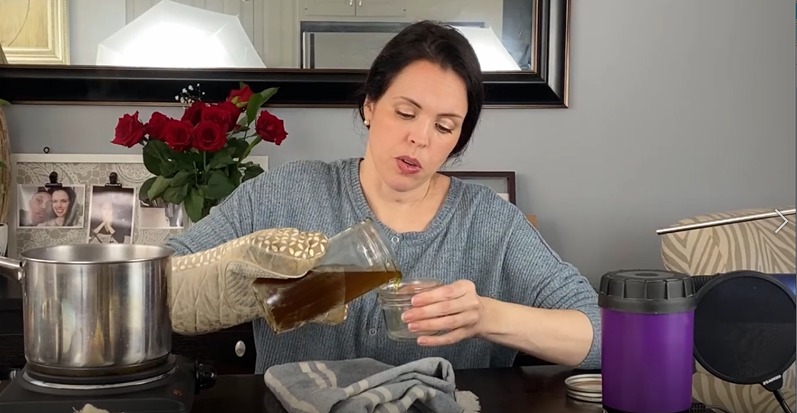
Step 6 – Store Your DIY Hemp Flower Salve
You can store your freshly made DIY CBD topical directly in the mason jar you prepared it. For easier access, I like to pour it into shorter wide-mouth containers.
Set the filled containers to the side and screw on the top after it’s cooled.
Step 7. Enjoy your fresh, homemade cannabis salve.
Here’s how I decarb perfectly every time:
https://vimeo.com/500987268Trending Now